Table of Contents
FPGA Logic design resources
The FPGA part of the course follows the Gateway Lab exercises developed at Univ. of Edinburgh by Khaled Benkrid and Tom Clayton.
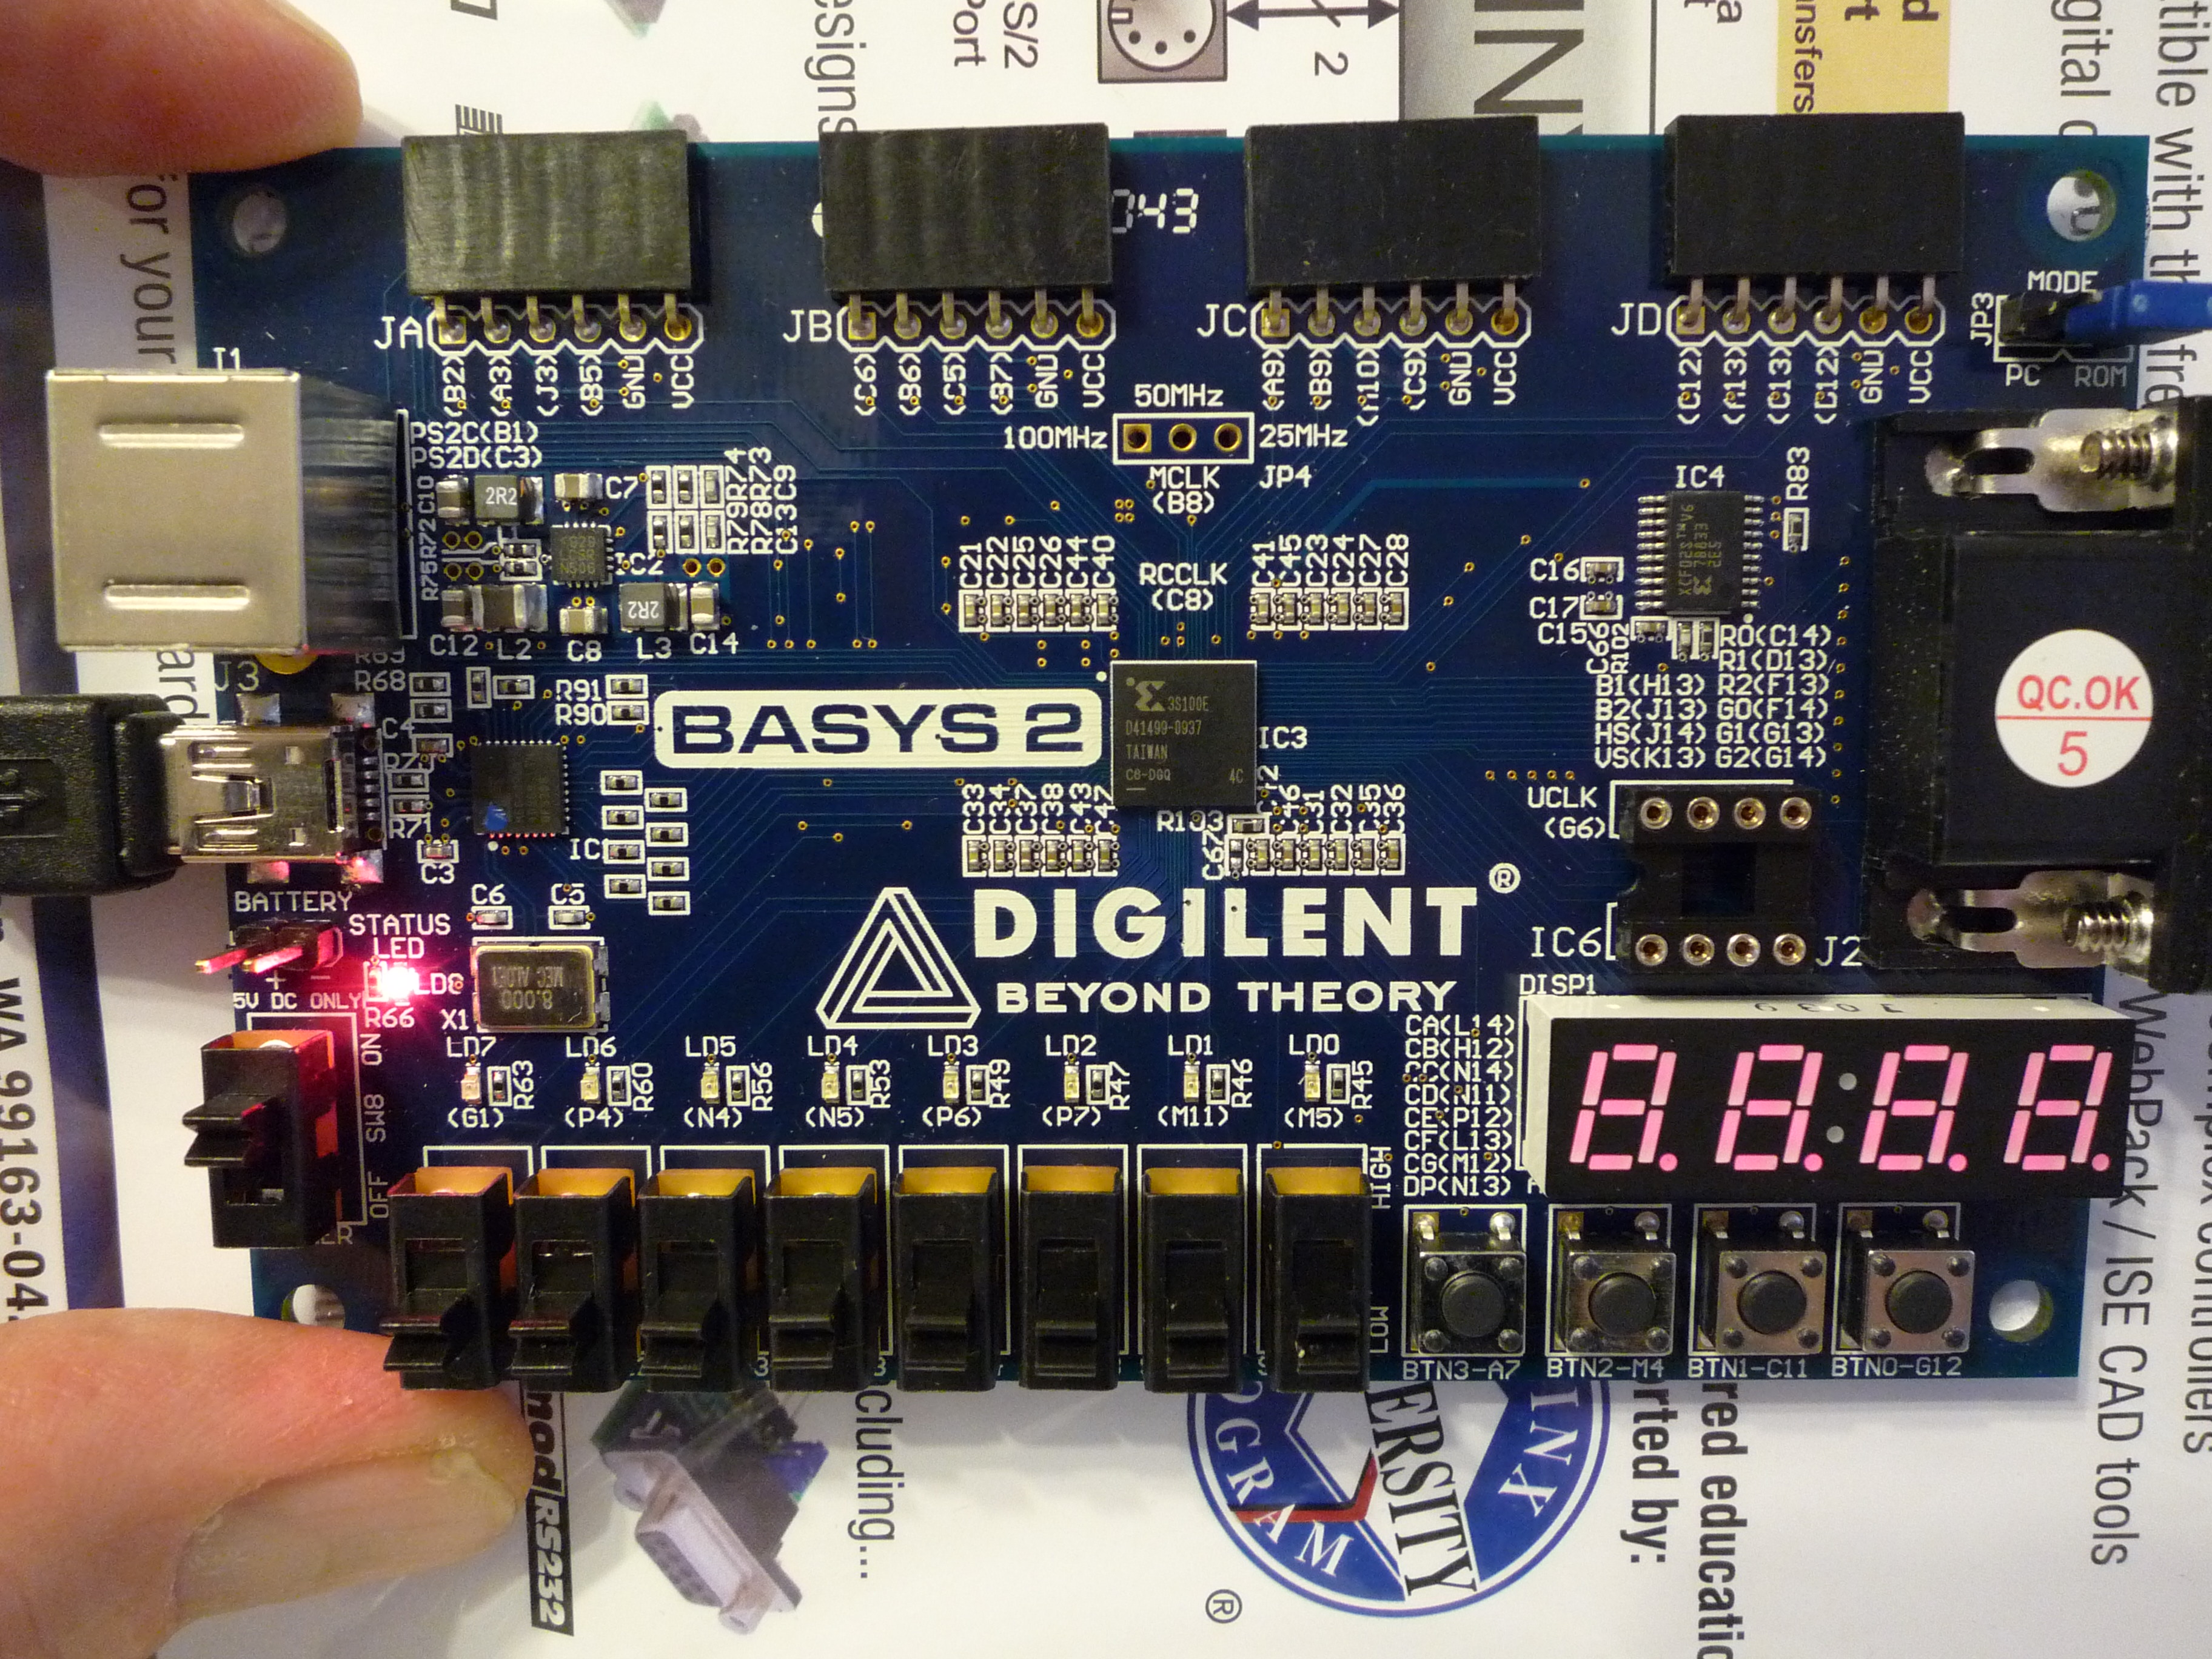
We use the BASYS2 FPGA board shown below from Digilent for these exercises; there are many PMOD add-on boards to extend the BASYS2 functionality.
We'll be using Verilog to configure our FPGAs. See here for a good verilog HDL reference guide.
News
28.3.2014: WebPack Xilinx license is not included on “full” Xilinx ISE Design Suite
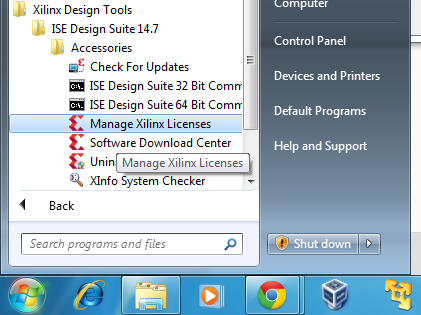
So you need to add a Xilinx.lic file, which you will find in this zip file , to your license manager. To do so, open the Xilinx License Manager from Xilinx Program folder:
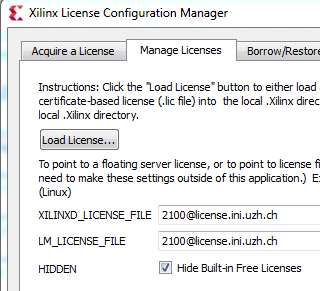
Then click on the “Load License…” button of the “Manage License” tab and look for the file Xilinx.lic inside the above zip file.
29.10.15: We are now using BitTorrent Sync to share the Xilinx 14.7 ISE tar files. See installation instructions below.
22.3.2014: Torrent files added for Xilinx installer download. See installation instructions below.
13.4.2012: We have a working license server for the full Xilinx ISE Design Suite. Instead of registering with Xilinx and obtaining a WebPACK license, you could try using our new floating license server. In the Xilinx License Manager, set the LM_LICENSE_SERVER to
2100@license.ini.uzh.ch
Installation
To set up for the FPGA configuration, you will need to do the following:
- First install Digilent's Adept software for windows or linux because this goes quickly. Adept is what you will use to download the FPGA configuration to the BASYS2 board. Under Windows, the Adept installation may also need to download Microsoft run-time libraries.
You may later want to see also Digilent Plugin for Xilinx Tools which enables programming the BASYS2 directly from Xilinx ISE Impact and this informative forum post. - Do one of the next two steps:
- 1, You can download the Xilinx 14.7 ISE installation tar archives by BitTorrent Sync: Linux Xilinx ISE installer, or Windows Xilinx ISE installer. This will require that you install the Sync application. For linux users, shell integration so that you can click on the link and have Sync add the share does not work. Instead, you will need to use Manual Connection… in the Sync app (click on the gear icon in top right corner) and paste there the link to the BTSync share. Mac users: Safari may not open the link properly. Use firefox instead.
- 2, Or, download ISE version 14.7 from Xilinx at Xilinx ISE FPGA development tools. You will need to register with Xilinx for this download. For the class, we are using Xilinx ISE 14.7. You cannot use the new Vivado Xilinx framework because the Spartan 3E FPGA is not supported in Vivado. Scroll down the download page to come to the single-archive installations for linux and windows. MacOS users will need to run ISE in a virtual machine.
- For the Xilinx ISE installation, you will need about 30GB of free space. The archived download is about 7GB, and the installation requires about 21GB!!!!
- Unpack the giant tar file. For windows, run xsetup.exe. For different flavors of linux, navigate to one of the bin/lin* folders and run the xsetup script there.
- From the dialog that appears, accept the license (two pages), then select to install either “ISE WebPACK” or “ISE Design Suite: Logic Edition”. If you will register with Xilinx and obtain your own free WebPACK license, install WebPACK. If you want to use the class license, then you can install ISE Design Suite: System Edition which has more powerful functionality and allows larger devices to be programmed. (It's not clear if we would ever use this additional functionality in the class.)
- From next dialog, select to “Acquire or manage a license key” (default). Also select to Install the “Cable drivers” but not “WinPCAP for Ethernet hardware co-simulation” (we will be downloading FPGA configuration over USB using Digilent's ADEPT program; at the moment it is not clear if we need the Xilinx cable drivers….). You don't need the Cortex-A9 options.
- From the next pane, let Xilinx install to (for windows) c:\Xilinx\14.7 or similar. Do not use a folder with spaces since some legacy tools may not like it. Deselect Use multiple cores option if you want to try to use your machine for anything else during install. In fact, just schedule the install for a time when you can just go away for a while, since your machine will be so busy talking to the disk it will become basically unusable during install.
- For Windows, you do not need to install the Jungo USB drivers or the Xilinx driver since we will use Adept software to install the FPGA configuration over the microcontroller on the BASYS2 board. You can install the Digilent Universal Serial Bus Controller.
- We recommend that you run the Xilinx 32-bit Project Navigator, not the 64-bit version. Hint: To quickly launch the ISE project navigator from Windows, hit start button and start typing “32-”.
- You don't need the MATLAB installation for System Generator.
- If you installed WebPACK, choose “Get free ISE WebPACK license” for the license option. Or else see the next step.
- If you installed System Edition, then set your environment variable as follows. If you use linux, then in your .bashrc set the environment variable LM_LICENSE_SERVER. If you use Windows, then from the ISE Project Navigator's Help/Manage License… menu item, select the Manage Xilinx Licenses tab and set LM_LICENSE_SERVER to the same value shown below. Using the license manager, you also need to copy the license file that is supplied here to the right folder so that ISE can later find it.
LM_LICENSE_SERVER=2100@license.ini.uzh.ch
export LM_LICENSE_SERVER
- To start the ISE in Windows, go to //Start/All Programs/Xilinx ISE Design Suite XX/ISE Design Tools/XX-bit Design Navigator//. (//XX// for your 32 or 64 bit windows version.)
Linux notes
Simon Corrodi reported in 2011:
I installed:
- Adept runtime
- Adept Utilities from http://www.digilentinc.com/Products/Detail.cfm?NavPath=2,66,828&Prod=ADEPT2
- Xilinx ISE
The ISE Project Navigator is hidden at “ISE/bin/lin/ise”
Because the Floorplaner didn't start, I had to add to the “settings.sh” at toplevel if ISE directory:
DISPLAY=:0
export DISPLAY
Found at and some more possible problems: https://help.ubuntu.com/community/XilinxISE
Adept starts with the command: djtgcfg
djtgcfg prog -d Basys2 -i 1 -f "FILE"
(-i 1 to select the PROM)
Downloads
- See the class schedule for the logic design exercises.
- The exercises are on separate Gateway labs pages.
- Adept application user manual (from Adept installation folder).
- BASYS2 user manual. Very useful guide to get started with the board.
- BASYS2 UCF file. This User Constraints File is useful because you can chop out parts of it to wire up your logic to the BASYS2 board outputs in Xilinx ISE.
- The Xilinx forums have lots of activity.
- See Xilinx ISE licensing guide if you have license troubles.
Notes
The license is donated from Xilinx university program (Request donation link) yearly. It must be installed on the license server at INI:
> lmutil lmstat
lmutil - Copyright (c) 1989-2008 Acresso Software Inc. All Rights Reserved.
Flexible License Manager status on Fri 1/11/2013 14:53

License server status: 2100@license.ini.uzh.ch
    License file(s) on license.ini.uzh.ch:
/usr/local/flexlm/licenses/license.dat:
FAQ
- How can I program the BASYS2 using the PC connection, rather than loading it onto the PROM?
You need to generate a programming file with a slightly different startup clock option. See http://www.digilentinc.com/Support/FAQs.cfm under the item “Adept Suite Software/When I am using Export to program an FPGA I receive the error “startup clock for this file is CCLK instead of JTAG-CLK, problems will likely occur.” What do I do?” Then use the top option in Adept to load the resulting bit file directly into the FPGA. It only requires a couple of seconds to load the bit file this way, compared to 30s to reprogram the PROM. In order to program the FPGA, you need to get 3 things right: 1) you have to generate the correct type of programming file in Xilinx. 2) You must select the correct option in Adept. 3) You need to have the jumper to the correct position on the BASYS2 board. - Which on-board clock should I use?
You can use B8 which is the 50MHz clock source. - Are some pins mislabeled on the BASYS2 board? . Yes, there are some mislabeled pins, e.g. the 7-segment display pins and the clock input pin are mixed up.
- What causes the large amount of jitter in the VGA display output? The clock circuit on the BASYS2 has a lot of jitter, causing very unstable edges of the VGA display output. A solution is to use an different clock driver module. From 2013, this issue was investigated by David Nadlinger, one of the students. He reported the following:
In last week's class, we briefly discussed the issue of the absurd amount of jitter in the VGA output generated by the Basys2 board. I investigated the problem a bit further as I couldn't get my LCD to sync at all. Without having a frequency counter/scope at hand, it is rather hard to make definite statements, but from various online sources, it seems like the root cause really is system clock jitter.
This does not seem unreasonable, because the board doesn't come with a crystal oscillator, but uses an LTC6905 silicon oscillator instead.
The best solution would probably be to just add an external oscillator. The DIP8 socket on the board seems to accommodate a standard 3.3V 4-pin CMOS oscillator, but unfortunately, I don't have a fitting part available for testing. I don't suppose you happen to have such a 50 MHz oscillator lying around somewhere in the lab either? An external clock source that could be used to pin down the issue?
If you do use an external CMOS osciallator, then note that the BASYS2 boards are (or were) mislabeled. The actualy external clock is M6, not G6 as is labeled on the boards (Tobi 2014)
Another interesting workaround, brought up on the web, is to add a resistive load (160 Ohm) between the power rails using one of the expansion ports. I have yet to verify it and look at the board design in detail in order to figure out what the most plausible explanation for this is.
We tried the resistor solution but it did not really help (Tobi 2014)
The www.digikey.com part number is XC276-ND for an 8-DIP 25MHz oscillator module that costs about $3.60 each.


